-1- How to Sharpen a Knife with a whetstone
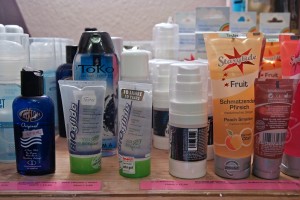
First off, you need a whetstone and some form of lubricant. Spit will work but you can use the special sharpening oil if no one ever taught you how to spit. You can also you use sex lube. I’m sure it will work. Some stones will have more than one surface and which one you use will be determined by how jacked up your blade is. If your blade looks like it was confused with a hammer at one point, then you need to use the rough side of the stone first. If it looks like what you imagined a blade should look like, you can use the medium or fine surface. If your stone has only one type of surface, it’s most likely somewhere between medium and fine and if you’re working with a rusty hammer blade, then you’re going to be there a while. Next, you get a thin coat of spit, motor oil, butt lube, or whatever you’re using on the stone surface.
Place the stone going away from you long ways and place the tip of your knife blade on the center of the stone near the end closest to you with the blade facing away. Maintaining a 30 degree angle between the back of the blade (spine) and the surface of the stone, apply light pressure while moving the knife down the stone and away from you like your slicing a layer off. The idea is for the whole blade to come in contact with the stone with each pass in this manner. Do this 5-7 times on one side then switch to the other side of the blade. Repeat this process while reducing the number of passes each time by two until you get down to a single pass per side. Wipe the blade when finished and look down the edge of the blade. The bevel should be obvious and it should feel sharp when dragging the tip of your finger ACROSS the blade, not up and down it. The up and down method gets used for something else and if someone taught you how to do that, then you should wonder why. Depending on if you used your kitchen cutlery to hack up the neighbor’s cat depends on how many times you have to repeat this.
-2- How to Start a Fire
The three things that are needed to start a fire are heat, fuel, and air. First comes fuel and there are several types. To start, you need something called tinder (not THAT Tinder…) that burns easily, and can be anything…like paper, moss, or old man’s beard.
Tinder should burn quickly and is only used for igniting the next piece of fuel called kindling. Kindling is made up small pieces of wood no larger in diameter than your fingers. Make a little hut out of the kindling with the tinder inside when you light it. As the tinder is lit, make sure that it gets plenty of air. As the fire gets bigger you can add bigger branches and logs. Wood that is on the ground will always burn better than wood that you take from a living source.
-3- Diagnosing Why a Car Won’t Start
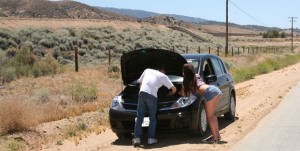
This is pretty useful for obvious reasons, but it’s also pretty useful for being able to help other people. And by help other people I mean helping hot girls.
The three things a car engine needs to start are spark, fuel, and crank. Crank is what causes the engine to “turn over” and refers to what happens between the time that you turn the key and the time that the engine starts. The fuel bit refers to gasoline this time, not wood, and spark is used to ignite the fuel and is delivered by the spark plugs. There are all sorts of exceptions to this tutorial that usually come in the way of new or expensive cars, so if the stranded hot girl is driving a 2011 6-series, better just to offer a ride instead of looking like a dumb ass. First is check the fuel level. If it’s good, turn the key. If it makes noises, step two, if not, jump the car with the jumper cables you keep in your trunk to rescue stranded hotties. Step two is have the female sit in the car while you go under the hood and pull a spark plug wire out of the engine by the rubber cap, not the wire itself. Have her turn the key like she’s trying to start the car and put the end of the spark plug wire near something metal and you should see a spark arc between the two pieces of metal. If not, she’s screwed. If so, replace the spark plug where you found it. The next and last step before she needs either a professional or someone better than you is to find the ignition and fuel relays and fuses which are under the hood or under the dash in plastic boxes with removable covers. Use the diagram on the cover to determine what’s what. Find the relays and fuses labeled ignition or fuel. If it’s a relay, just pull it out and put it back, if it is a fuse, check to see if it’s blown by looking through the clear plastic. If it is, replace it with a labeled spare in the box. If none of this works, well, not everyone can be a hero.
-4- How to Cut Down a Tree
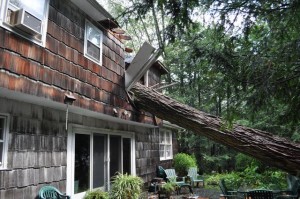
Cutting down trees is easy if you know how and have the right tools. A chainsaw is pretty simple and you just figure out what direction you want the tree to go in and start cutting with the blade parallel to the ground. When you get about halfway through the tree, pull out (like any smart guy would) and start a new cut coming down at a 45 degree angle to the first cut aiming to cut out a wedge. Once that’s out, just start cutting again parallel to the ground. If it’s windy, wait for a lull to accomplish this last part because the wind can negate your wedge cutting tree felling strategy and put the tree in your house.

We don’t need more TIFU content. But if you do fuck something up be sure to tag us so we can make proper use of your misfortune.
If you do it right, the tree will fall in the direction of the wedge you cut. If you do it wrong, you can sell the wood in attempt to pay for whatever you destroyed.
-5- How to Aim a Gun
There’s a lot to learn when it comes to any of this stuff but I can’t feel good about teaching anything gun related without first mentioning that you should treat every weapon as if it were loaded, never point a weapon at anything you don’t intend to shoot, keep the weapon on safe until you are ready to fire, keep your finger straight and off the trigger until you intend to fire, and finally, know your target and what lies beyond it. If you follow these rules, it’s virtually impossible for anything unintended to happen.
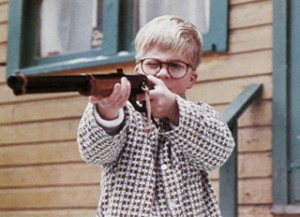
Now for aiming. There’s the rear sight aperture which is the piece you look through closest to the rear and the front sight post which the portion of the sighting system that is near the muzzle. With most sights, the goal is to line up the front sight post in the middle of the rear sight aperture so that equal amounts of light can be seen on both sides of the front sight post. You want the front sight and the rear sight to come together to create what’s called a sight picture and it should form a straight line across the top that should bisect your target. Before you pull the trigger, your sight picture should have the front sight in focus and the rear sight aperture and target should be blurry. With a sight picture like that you won’t have to get made fun of when your girlfriend’s dad wants to take you shooting.

Tags : Adulting, Advice for Men, Blade, Business, featured, Fire, Firelighting, Growing Up, Knife, Knowledge, Lessons, life, Manzone, Sharpening stone, Skills, Spark plug, tips


Subscribe. Follow. Like.
To RSS Feed
Followers
Fans